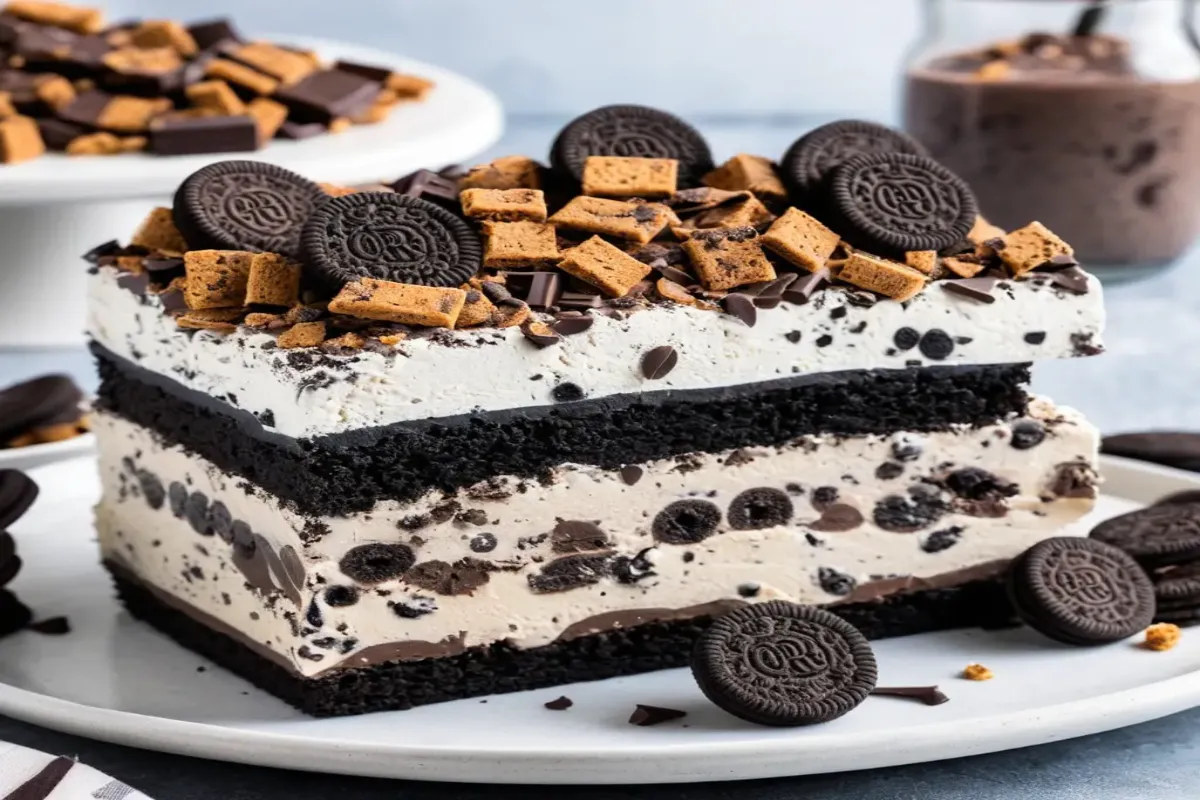
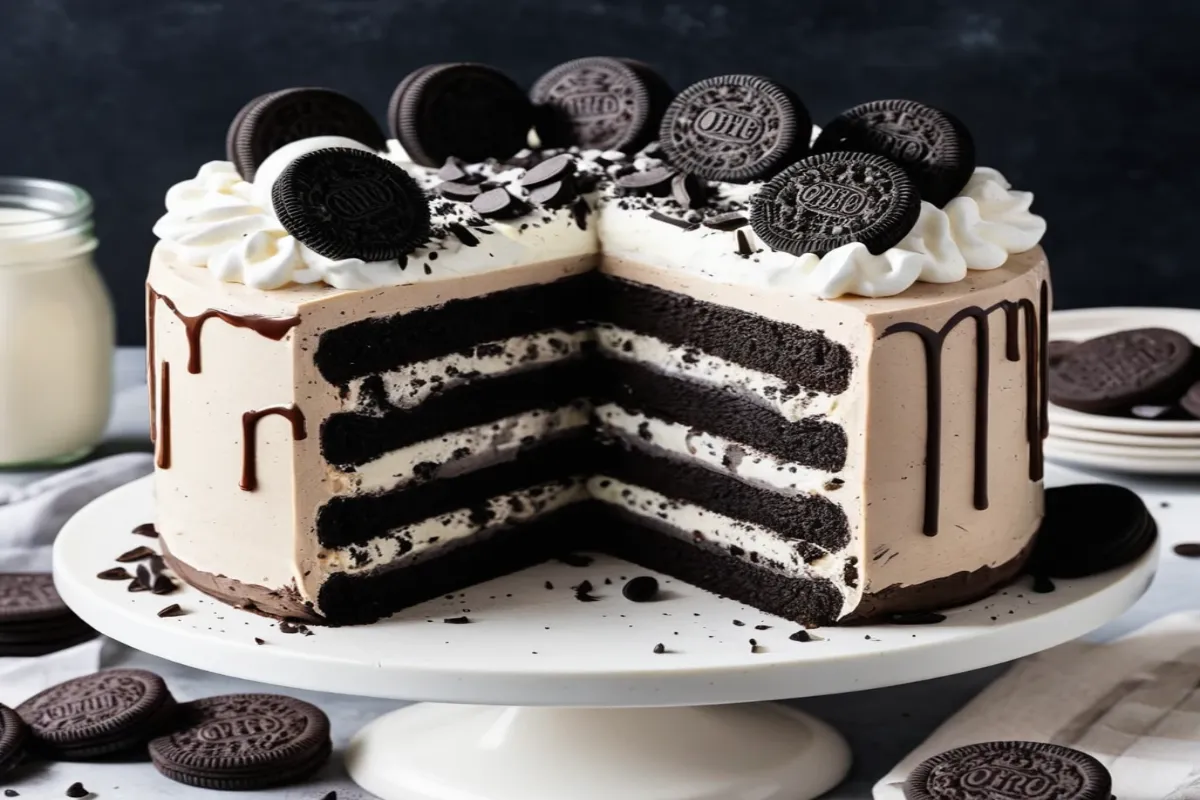
There’s nothing like an Oreo Ice Cream Cake to make celebrations sweeter. This popular ice cream cake, with layers of chocolate fudge, Oreo cookie crunchies, and vanilla and chocolate ice cream, is an iconic dessert that combines creamy texture with crunchy deliciousness. If you’ve ever wondered how to recreate this masterpiece at home, you’re in the right place!
In this article, I’ll guide you step-by-step through making this delightful treat. You’ll find helpful tips on ingredients and assembly. I’ll also share some pro secrets that will make your cake taste just like the original. Plus, we’ll cover different ways to customize your cake, troubleshooting common issues, and how to store and transport it effectively.
Why Make Oreo Ice Cream Cake at Home? | Benefits of Homemade Ice Cream Cake
There are several reasons why making an ice cream cake at home can be the better choice. Besides saving on the cost, you also gain the ability to customize it to your own liking. Want more Oreo cookie crunchies? You got it! Prefer an extra fudge layer? No problem. Making it yourself also means you can avoid the preservatives often found in store-bought versions. Plus, making your own cake gives you the freedom to adjust the sweetness, add extra flavors, and even choose your favorite brand of ice cream.
Homemade ice cream cakes can also be a fun project, especially if you enjoy baking and creating your own desserts. You get to be in control of the ingredients, which means you can also experiment with unique combinations like adding a caramel layer or incorporating a fruity twist with berries. Not to mention, there’s a certain sense of pride and satisfaction that comes from serving a homemade cake at a gathering.
Before diving into the detailed steps, it’s worth mentioning that if you’re planning on making this cake, using the right equipment like a springform pan is key. A springform pan is a type of baking pan with removable sides, making it much easier to release delicate cakes, such as ice cream cakes, without damaging their shape. A springform pan ensures your cake has smooth sides and makes releasing it from the mold simple and mess-free. Additionally, using parchment paper or plastic wrap can help prevent sticking and make the cleanup process easier.
And if you’re interested in making a homemade hot fudge sauce, you can check out how to make hot fudge sauce for an extra touch of homemade goodness! A homemade fudge sauce can add a richer flavor compared to store-bought options, and you can adjust the sweetness to your liking.
Ingredients for Oreo Ice Cream Cake | Homemade Ice Cream Cake Ingredients
The ingredients for this cake are simple, but when combined, they create a dessert that is truly out of this world. Make sure to gather everything before starting, as this will make the process smoother and more enjoyable.
In Relation to the Oreo Cookie Crunchies:
- 1 cup Oreo cookies, crushed (about 12 cookies)
- 3 tablespoons unsalted butter, melted
For the Ice Cream Layers:
- 1.5 quarts chocolate ice cream, softened
- 1.5 quarts vanilla ice cream, softened
Regarding the Chocolate Fudge:
- 6 ounces semi-sweet chocolate chips
- 1/2 cup heavy whipping cream
- 3 tablespoons unsalted butter, softened
- 1 teaspoon vanilla extract
For the Whipped Cream Frosting:
- 2 cups heavy whipping cream, cold
- 1 cup powdered sugar
- 1 1/2 teaspoons vanilla extract
- Sprinkles or Oreo crumbs for decorating (optional)
 Step-by-Step Instructions
Step 1: How to Make Oreo Cookie Crunchies for Ice Cream Cake
- Preheat your oven to 350°F.
- In a medium bowl, mix together the crushed Oreo cookies and melted butter until all of the crumbs are moistened.
- Spread this mixture evenly on a baking sheet lined with parchment paper.
- Bake for 8-10 minutes, or until the crumbs are crispy. Let it cool completely, then break into smaller pieces for an extra crunch in the ice cream cake.
This layer adds the signature crunch to your ice cream cake, and baking the crumbs helps them stay crisp even when layered between ice cream.
Step 2: Prepare the Chocolate Ice Cream Layer for Oreo Cake
- Remove the chocolate ice cream from the freezer about 15-20 minutes before you need it, allowing it to soften.
- Line a springform pan with plastic wrap, ensuring the edges hang over so that you can easily lift out the cake.
- Spread the softened chocolate ice cream evenly into the pan. Smooth it out as much as possible, and freeze for at least 30 minutes to firm up.
Softening the ice cream makes it easier to spread, ensuring an even layer. Be patient during this step, as a smooth layer will help the cake look more professional.
Step 3: Add the Chocolate Fudge Layer to Your Oreo Ice Cream Cake
- Combine the chocolate chips, butter, and heavy cream in a medium saucepan over medium heat.
- Stir continuously until everything is melted and smooth.
- Let it cool for about 5 minutes, then spread a layer of this fudge sauce over the chocolate ice cream layer.
- Sprinkle half of the Oreo crunchies on top of the fudge layer. Freeze for another 30 minutes.
The chocolate fudge layer is what makes this cake extra indulgent. If you prefer a thicker fudge layer, you can double the recipe for an even richer taste. Make sure the fudge has cooled slightly before adding it to avoid melting the ice cream.
Step 4: Add the Vanilla Ice Cream Layer for Oreo Ice Cream Cake
- Allow the vanilla ice cream to soften for about 15 minutes before adding it to the cake.
- Spread the vanilla ice cream over the chilled fudge and cookie crunch layer. Smooth it out evenly and freeze for at least 2 hours, or until completely firm.
This step ensures that the contrasting flavors of chocolate and vanilla are evenly layered. Freezing each layer individually helps the cake maintain its structure.
Step 5: Whipped Cream Frosting and Decorating Your Oreo Ice Cream Cake
- In a large mixing bowl, whip the heavy cream until it begins to thicken.
- Add the powdered sugar and vanilla extract, continuing to whip until stiff peaks form.
- Remove the cake from the freezer and spread a thick layer of whipped cream over the top and sides of the cake.
- For decoration, sprinkle the remaining Oreo crunchies or add colorful sprinkles.
- Return the cake to the freezer for at least 1-2 hours to allow everything to set.
Decorating your cake is where you can get creative. You could add extra toppings like chocolate drizzle, crushed candies (such as M&M’s or Reese’s Pieces), or even fresh fruit like strawberries, raspberries, or blueberries to make your cake stand out. If you want to make the cake look like a professional Dairy Queen version, use a piping bag to add decorative whipped cream swirls around the edges.
Serving Tips for Oreo Ice Cream Cake
- For clean slices, dip a knife into hot water and wipe it off between each cut.
- Let the cake sit at room temperature for about 10 minutes before serving to make it easier to slice.
Serving the cake at the right temperature ensures that you get clean, neat slices. The hot knife trick works wonders for cutting through frozen layers without cracking them.
Storing and Transporting Your Oreo Ice Cream Cake
Store any leftover ice cream cake in an airtight container in the freezer. If you’re transporting the cake, make sure to use an insulated cooler with ice packs to keep it cold. You can even use dry ice if the trip is long just be sure to let the cake thaw slightly before serving to make cutting easier.
Transporting an ice cream cake can be tricky, especially during warmer weather. Using dry ice or an insulated cooler will keep the cake from melting, ensuring it arrives at your destination in perfect condition. If you’re transporting it for a party, consider decorating it at the venue to avoid any potential mishaps.
Tips for Customizing Your Oreo Ice Cream Cake | Creative Ideas for Ice Cream Cake
One of the best parts about making your own Oreo Ice Cream Cake is that you can customize it however you like. Here are some ideas to make your cake unique:
- Add Caramel or Peanut Butter: Drizzle caramel or peanut butter sauce over the fudge layer for an extra layer of flavor.
- Use Different Ice Cream Flavors: Try using mint chocolate chip, cookies and cream, or even strawberry ice cream for a twist on the classic.
- Incorporate Fresh Fruit: Add a layer of sliced bananas or strawberries for a refreshing burst of flavor.
- Make It Extra Crunchy: Add chopped nuts or toffee bits to the Oreo cookie crunchies for added texture.
Experimenting with different flavors and textures is part of the fun. You can create a cake that’s tailored to your favorite tastes, making it even more special.
 Frequently Asked Questions (FAQs)
How Long Should I Freeze the Cake Before Serving?
For best results, freeze the cake for at least 6 hours, but overnight is preferable. This ensures all the layers are firm and the cake holds together well. Freezing it overnight also allows the flavors to meld together for a more cohesive taste.
Can I Use Different Cookies Instead of Oreos?
Yes! You can substitute Oreos with chocolate chip cookies, graham crackers, or any other cookie of your choice. Using different cookies can give the cake a unique flavor, and you can even mix multiple types of cookies for a fun twist.
Can I Make a Dairy-Free Version?
Absolutely! Substitute the ice cream with dairy-free alternatives like almond milk or coconut milk ice cream, and use a non-dairy whipped topping. There are many great dairy-free ice cream options available now, so you can easily make a version that suits dietary needs without compromising on taste.
How Do I Prevent the Cake from Melting While Serving?
To prevent the cake from melting too quickly, serve it immediately after removing it from the freezer. Make sure your serving area is cool, and consider placing the cake on a chilled platter. Keeping a few ice packs under the serving platter can also help keep the cake cold for longer.
Conclusion
Creating your own Oreo Ice Cream Cake at home is an incredibly rewarding experience. Not only do you get to enjoy the delicious combination of chocolate, vanilla, and Oreo, but you also have the satisfaction of making it yourself, tailored exactly to your taste. Making this cake allows you to be creative, experiment with flavors, and enjoy a personalized version of a classic treat.
Whether it’s for a birthday, a special occasion, or just because you feel like indulging, this ice cream cake is sure to impress. So grab your Oreos, soften your ice cream, and get started your perfect celebration cake awaits!
Enjoy making and eating this wonderful treat, and be sure to share the joy with friends and family! There’s nothing quite like seeing the smiles on everyone’s faces when you bring out a homemade ice cream cake that’s just as good, if not better, than the original.

